Mitch had the fastest lap in Classic 2? Darn, I though 6.54s was fast.....back to work!
Zack
You are not logged in. Please login or register.
The NASTE Forum → Posts by Wanabgts
Mitch had the fastest lap in Classic 2? Darn, I though 6.54s was fast.....back to work!
Zack
Nice job Al!
Zack
When i get back I will have to come take a looksy.
Zack
Is the Eldon pretty decent stuff? I have never seen any setup before....
Zack
I won't be able to make this Thursday's meet, First one I have missed since the first time I visited Al's....Have a great time everybody don't let him beat you up too bad!
Zack
We have been going 80 in open for a few meets. But i was suprised to do it with the GFX car. She was working good!
Zack
Looks like a blast!
I understand your concern with the warping and on most applications I use washers as well to help eliminate that from happening
Thats a good idea, I will see if that works well for me on my next build!
Glad someone finds them Helpful Bill, there was a time I could have used the info!
Zack
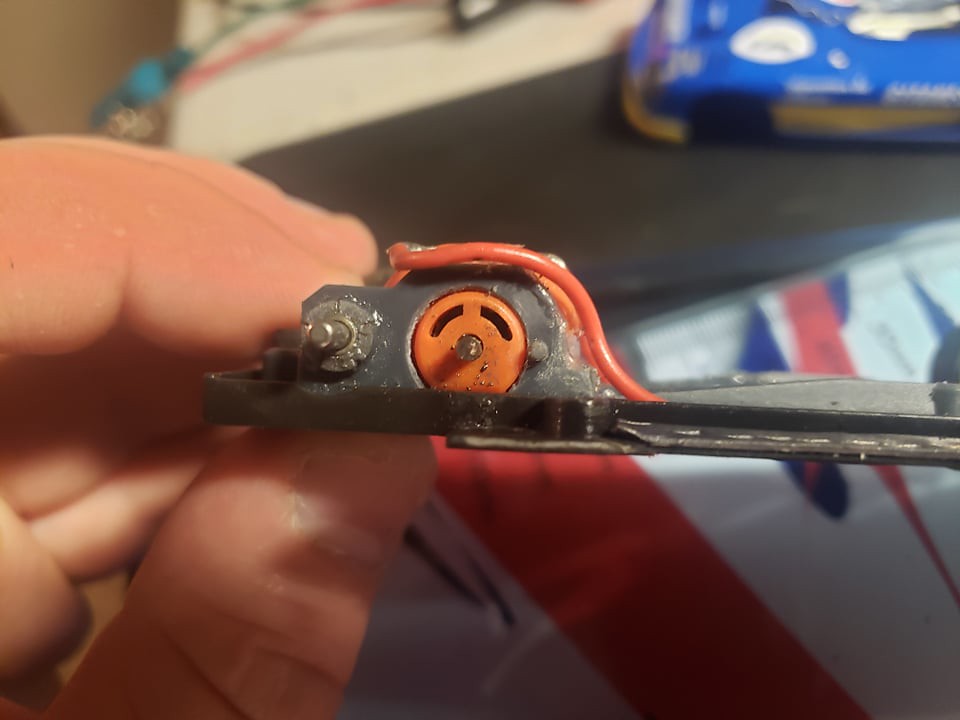
Good info Zack. Thank you. I prefer using motor screws over glue in case you want to remove the motor at a later time. Which is easy to do on Slot.it cars because they already have holes for them. I have drilled holes on other brands with my pin vise and installed screws.
Screws are definitely the easy way to go. Unfortunately I have found that they distort the pod on a lot of my cars, so i kinda got away from them. If I wanted to spend more time, you can easily do a little sanding or something to releive the stress of the screws.
I magnet the pod down and then just put a coulple small spots of shoe goo on there and let it dry. It seems to hold welland actually come off quite easily with pick if needed, kinda just peels out of the crack.
Zack
For front axle height at Al's, I tend to run just a tiny amount of upward slop and the wheels should be fully on the ground on your setup block. If they are not, you will likely be carrying the wheels in the air on his copper tape track.
After that, I trimmed off a small amount around the perimeter of the chassis where is was causing the most interference. When putting the body back on, remove the washers from the countersunk screws. This will allow much more float in the body. I am running the rear "snug" and the front -1/4 from snug to start out with.
He will likely need to replace the rear tires soon, but other than that this car should be good to go!


Hope this is valuable to some!
Zack
Next up, you could tell with the uneven wear on the front tires originally that they weren't round. So I went ahead and trued up the fronts, and took 1mm off the total diameter at the same time.
I run aluminum wheels on the front of all my cars, but the plastics turn just fine if you go slowly. After being turned they were coated in nail polish.
After the car was at weight, I removed the front axle bushings as they weren't allowing the car to get all the way down in the slot. The front axle could not go high enough up into the car.
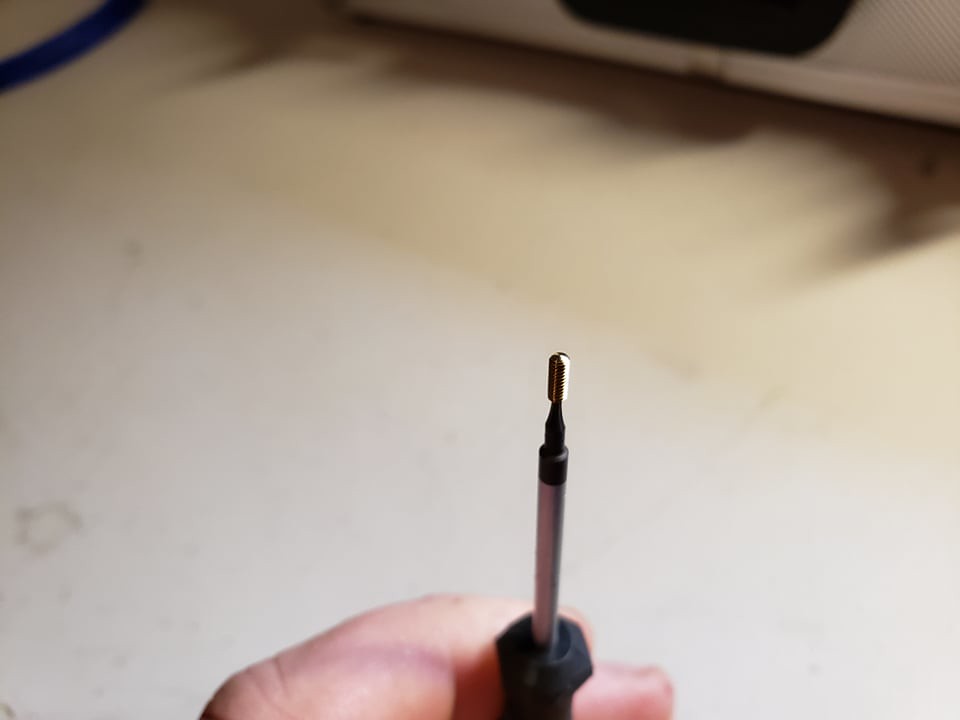
I also installed new Professor motor Brass Oval point screws into the chassis for axle height adjustment. These I believe are the best choice, since they have the lowest drag.

Continued....
Hey guys, I am working on one of Al's group c cars. Since we just ran this class I thought I would post about what I went through on his car to try and get it up to snuff. It's important to note that this was the slowest of his Group C cars, and he wanted to keep it inline because he uses these for IROC. The car I ran last thursday is converted to sidewinder, and I believe it to be the superior chassis layout.
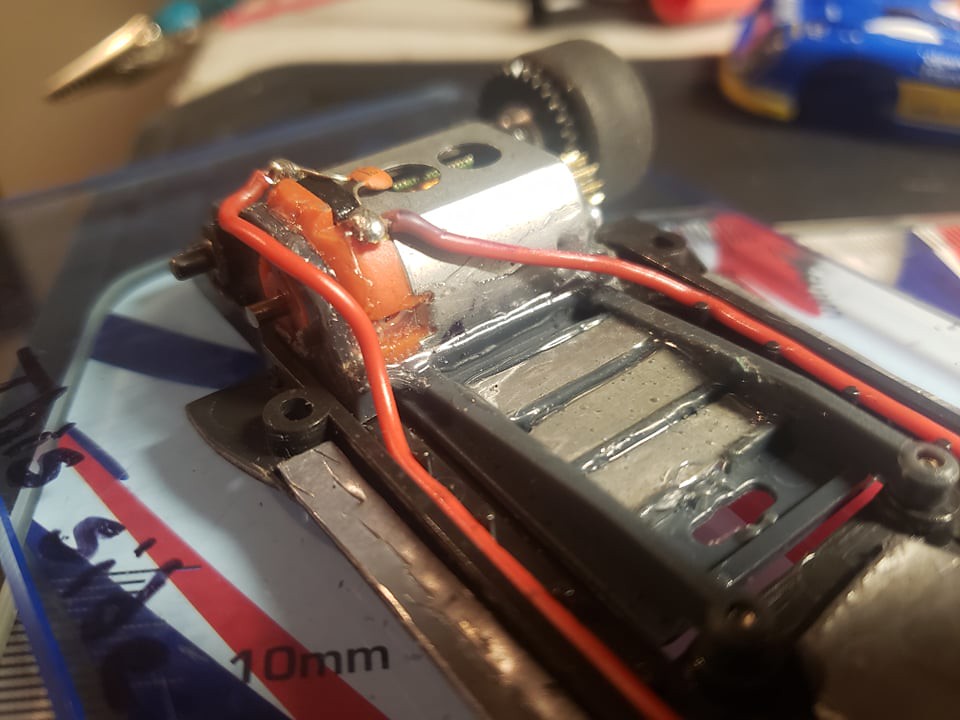
First thing, I flattened the chassis in the usual way, the motor pod was very flat to start with so nothing was done there. The motor was glued in lightly however.
Ballast outboard of the chassis seems to help a lot, and this car didn't have enough weight up front to compress the braids and keep the front down. So weight was added there as well. This car ended up at 76g total weight.


Continued.....
Rico. Thats a cool car for the class! I need to look more into the 3d options. That should open a lot of windows.
Zack
Bill, pretty tall ride height...But they are fairly wide. No pod either....Probably going to need that.
Zack
Alright, last night after listening to Monte rant about the spec GT40 class. I am now thinking about attempting a build on something else just to see how quick it can go.
So what else is a proper "sportscar" shape, that fits well in this class? I'm up for a challenge!
Zack
Had an awesome time last night. Thanks to everyone who came out and Al for hosting.
Missed you as well Mitch I was looking forward to seeing that F40!
Zack
Yeah, fun night- despite the classes being F1 and GT3. I really need to buff out an F1 and replace my heap of a GT3.
Tip of the hat to Zack though. He has built a crazy smooth fleet of cars, and while it may sound challenging, after a few minutes I was able to crack into the 5's pretty much at will. They are CRAZY fast and super smooth. He has certainly figured out the tuning game. What a fun fleet to flog around the track! Thanks for the loan!
Thanks for compliments Chris, it was my pleasure to watch you run some crazy fast laps!
Zack
5's huh? If I tried hard I might be able to build a car that fast, but I could never drive it that fast.
Fantastic work guys on both the building and the driving.
Thanks Mitch, we were able get both my Mclaren m8 and my Matra into the 5.9s. The fastest I could get out of either was a 6.1. Chris has that killer fast trigger!
Zack
I guess I need an f1 car....
Zack
I am hoping to make it out there Doc!
Zack
Had a great time as well. Thanks for always being a such a gracious host. I have to say the highlight was watching Kuba run some of slot.it cars into the 5's. But the racing was amazing too!
Zack
On his track I have had good luck with the whites on the lmp and high powered cars. Most of the gt cars run red foamies.
Zack
I can detail more items for prep, was just going one at a time. That is actually sheet lead folded three time over in those slots and shoe goo'd in.
I can post weight layout as well.
I have never ran the new motor, I think i have one of the ones your talking about though i will.have to tach it.
Every slot.it 21.5 I have revs more than that after break-in however.
I wrote a whole long post on prepping this car start to finish, but i got logged out and lost it. So i will just break it up!
Zack
I just test it every now and then when removing material. A couple I didnt have to remove much so the motor clipped in pretty solid. On this car i had to take a lot before the pod would sit flat with the motor it. It basically drop in and relies on the screws and glue to hold it.
I should have said, when I glue the motor and axle bushings in....I leave it magneted down to the plate as it all cures.
Zack
Alright guys, I have made some significant progress on the speed of my slot.it cars lately. I thought I would post up a couple of the main "breakthroughs" I have had.
Flattening the chassis is a given on these cars, nearly every one I have done they are significantly tweaked. But also the motor pod should be done at the same time. I simply install magnets in all three positions on the pod and stick it down to the flat bar, the same process to the chassis is used.
What I learned after doing this, is that when you screw the motor down (as you should) it tends to tweak the pod pretty severely after it has been flattened. I have started slowly sanding material out of the motor holder on both sides until the pod sits completely flat. And then screwing and gluing the motor in place.
After this is done I sand a small amount of material off of the bushing holder, so that the gear, shims, or wheel rides directly on the bushing itself instead of the plastic. This seems to remove a good amount of drag when cornering. After I have the bushings back in, I use the axle to align the bushing gently until the drag on the axle in minimized, and then put drops of CA glue through the slots to hold the bushing. BEWARE, this is a permanent mod so I would use new bushings if its a used car!

This is one of the things that powered my slot.it cars into the 6.1's at Al's recently. Not too time consuming and the results are there!
Zack
The NASTE Forum → Posts by Wanabgts
Powered by PunBB, supported by Informer Technologies, Inc.